 Standard casting iron housings
Suxin standard casting iron series of insert bearing units, kings of cact iron housings of 200/300 series, insert bearings of 200 series and some kinds of 300 series...
Read more >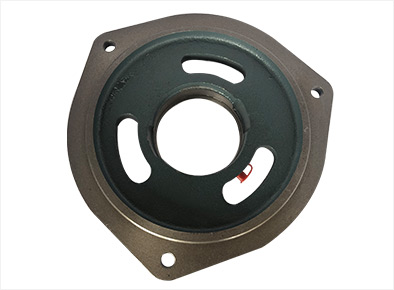 Stainless steel bearing units
Suxin stainless steelinsert bearing units, which commends stainless steel bearing and stainless cast steel housing...
Read more >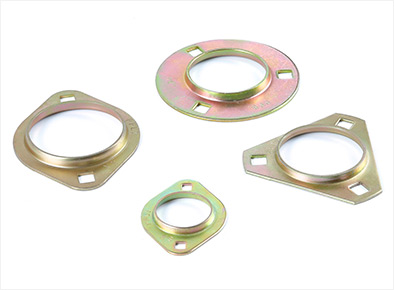 Pressed housing bearing units
Pressed steel plate housings, insert bearing units...
Read more >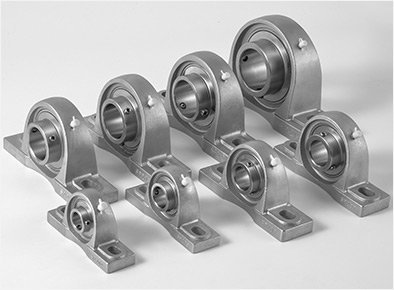 Casting iron products
Customized casting iron products, sproket, iron wheel...
Read more >
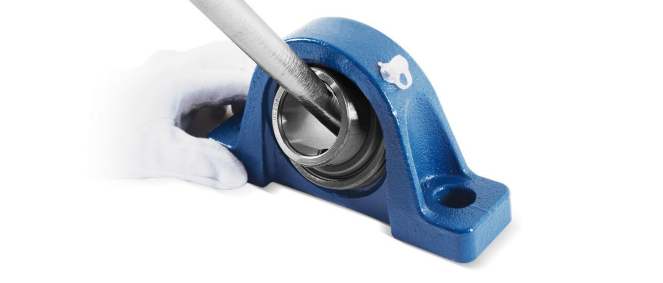
Assembly and Disassembly of SUXIN insert bearing u
- 1. Disassembly
1. Disassembly
1. DisassemblyRegarding the disassembly of insert bearing units, takes the unit with eccentric collar system as an example.
1. Loosen the locking screw on the eccentric sleeve with hexagon bar wrench, then insert the counterbore which on the eccentric sleeve with a small iron rod to loosen the sleeve against the rotaion direction of the shaft.
2. Loosen the bolts which holding the bearing unit. Remove the bearing along with housing together from the shaft. Should pay attention that must loosen the bolt at the other end of shaft before dismountin bearing unit at one end of the shaft, so as to avoid damage caused by mutual tension between the bearings at both ends of shaft.
- 2.1 Before Assembly
2.1 Before Assembly
2.1 Before AssemblyBefore mounting all kinds insert bearing units, some process must to be done as following,
1) Check the shaft's accuracy that no bending,burrs and other flaws.
2) Check the assembly base of machine or equipment should be adequately hard and strong, the surface must be as flat as possible.(flatness: Max 0.15mm but 0.05mm is the best condition for mounting)

- 2.2 Assembly/Installation of set screw bearing unit
2.2 Assembly/Installation of set screw bearing unit
2.2 Assembly/Installation of set screw bearing unit2.2.1 Pull out the anti-rotation pin on surface of out ring, clean the surface of shaft even daub rust preventing oil on it to reach anti-rust and allow slight roation after shaft fixed with bearing.
2.2.2 Aplly slight grease on working surface of bearing(outer ring surface) and housing(inner surface), press the bearing into housing to mount the bearing unit. (No need this step if bearing unit mounted already by SUXIN). Then put the bearing unit on shaft through the bore of bearing and push it to the right place where to install.
2.2.3 Pre-tightening bolts of housing and rolling the shaft to make itself aligning to right posision in the bearing unit.
2.2.4 Tighten the setscrews on bearing and bolts for housing by hexagon bar wrench with the recommended torque (attention that excessive tightening of the screws and bolts may damage the bearing unit).
- 2.3 Assembly/Installation of bearing unit with eccentric locking collar
2.3 Assembly/Installation of bearing unit with eccentric locking collar
2.3 Assembly/Installation of bearing unit with eccentric locking collar2.3.1 Assembly bearing unit, same as 2.2.1 to 2.2.3
2.3.2 Fit the eccentric collar to the eccentric section on the inner ring of bearing, and rotate it in the directionof shaft rotation by hands to tighten it temporarily.
2.3.3 Fit a small iron rod into or hold the counterbore on the eccentric collar and tap the rod in direction of shaft rotation with a hammer to fix collar on shaft.
2.3.4 Same process as 2.2.4
Attention: Eccentric loacking collar unit is not recommended to use in condition where the direction of shaft rotation is timely reversed, since the collar will be loosen.

- 2.4 Assembly/Installation of bearing unit with adapter sleeve
2.4 Assembly/Installation of bearing unit with adapter sleeve
2.4 Assembly/Installation of bearing unit with adapter sleeve2.4.1 Fit the sleeve onto the shaft and position it to make sure its tapered section is centered to the bearing.(Expanding its gap slowly with screwdriver or similar tools for easy fitting)
2.4.2 Assembly bearing unit, same as 2.2.1 to 2.2.3 but change the treatment for shaft to adapter sleeve, for that the bearing is connected with shaft by structure of sleeve.
2.4.3 Tighten the adapter sleeve Tighten the sleeve with a hammer which tap it on the side of bigger bore to make the bearing inner ring is closely seated on the sleeve.
2.4.4 Place the tooth lockwasher and tighten nut fully by hand.Then lock the nut with a hammer to tap a screwdriver which is fitted in one of slots on the nut. It will be locked until the nut turns to 60° or 90°.
2.4.5 Secure the nut by bending tooth of lockwasher so that it fits into slots on the nuts.
2.4.6 Tighten the housing
Do you have any question?
Tel: +86.519-86212040
E-mail: jssxbhc@su-xin.com